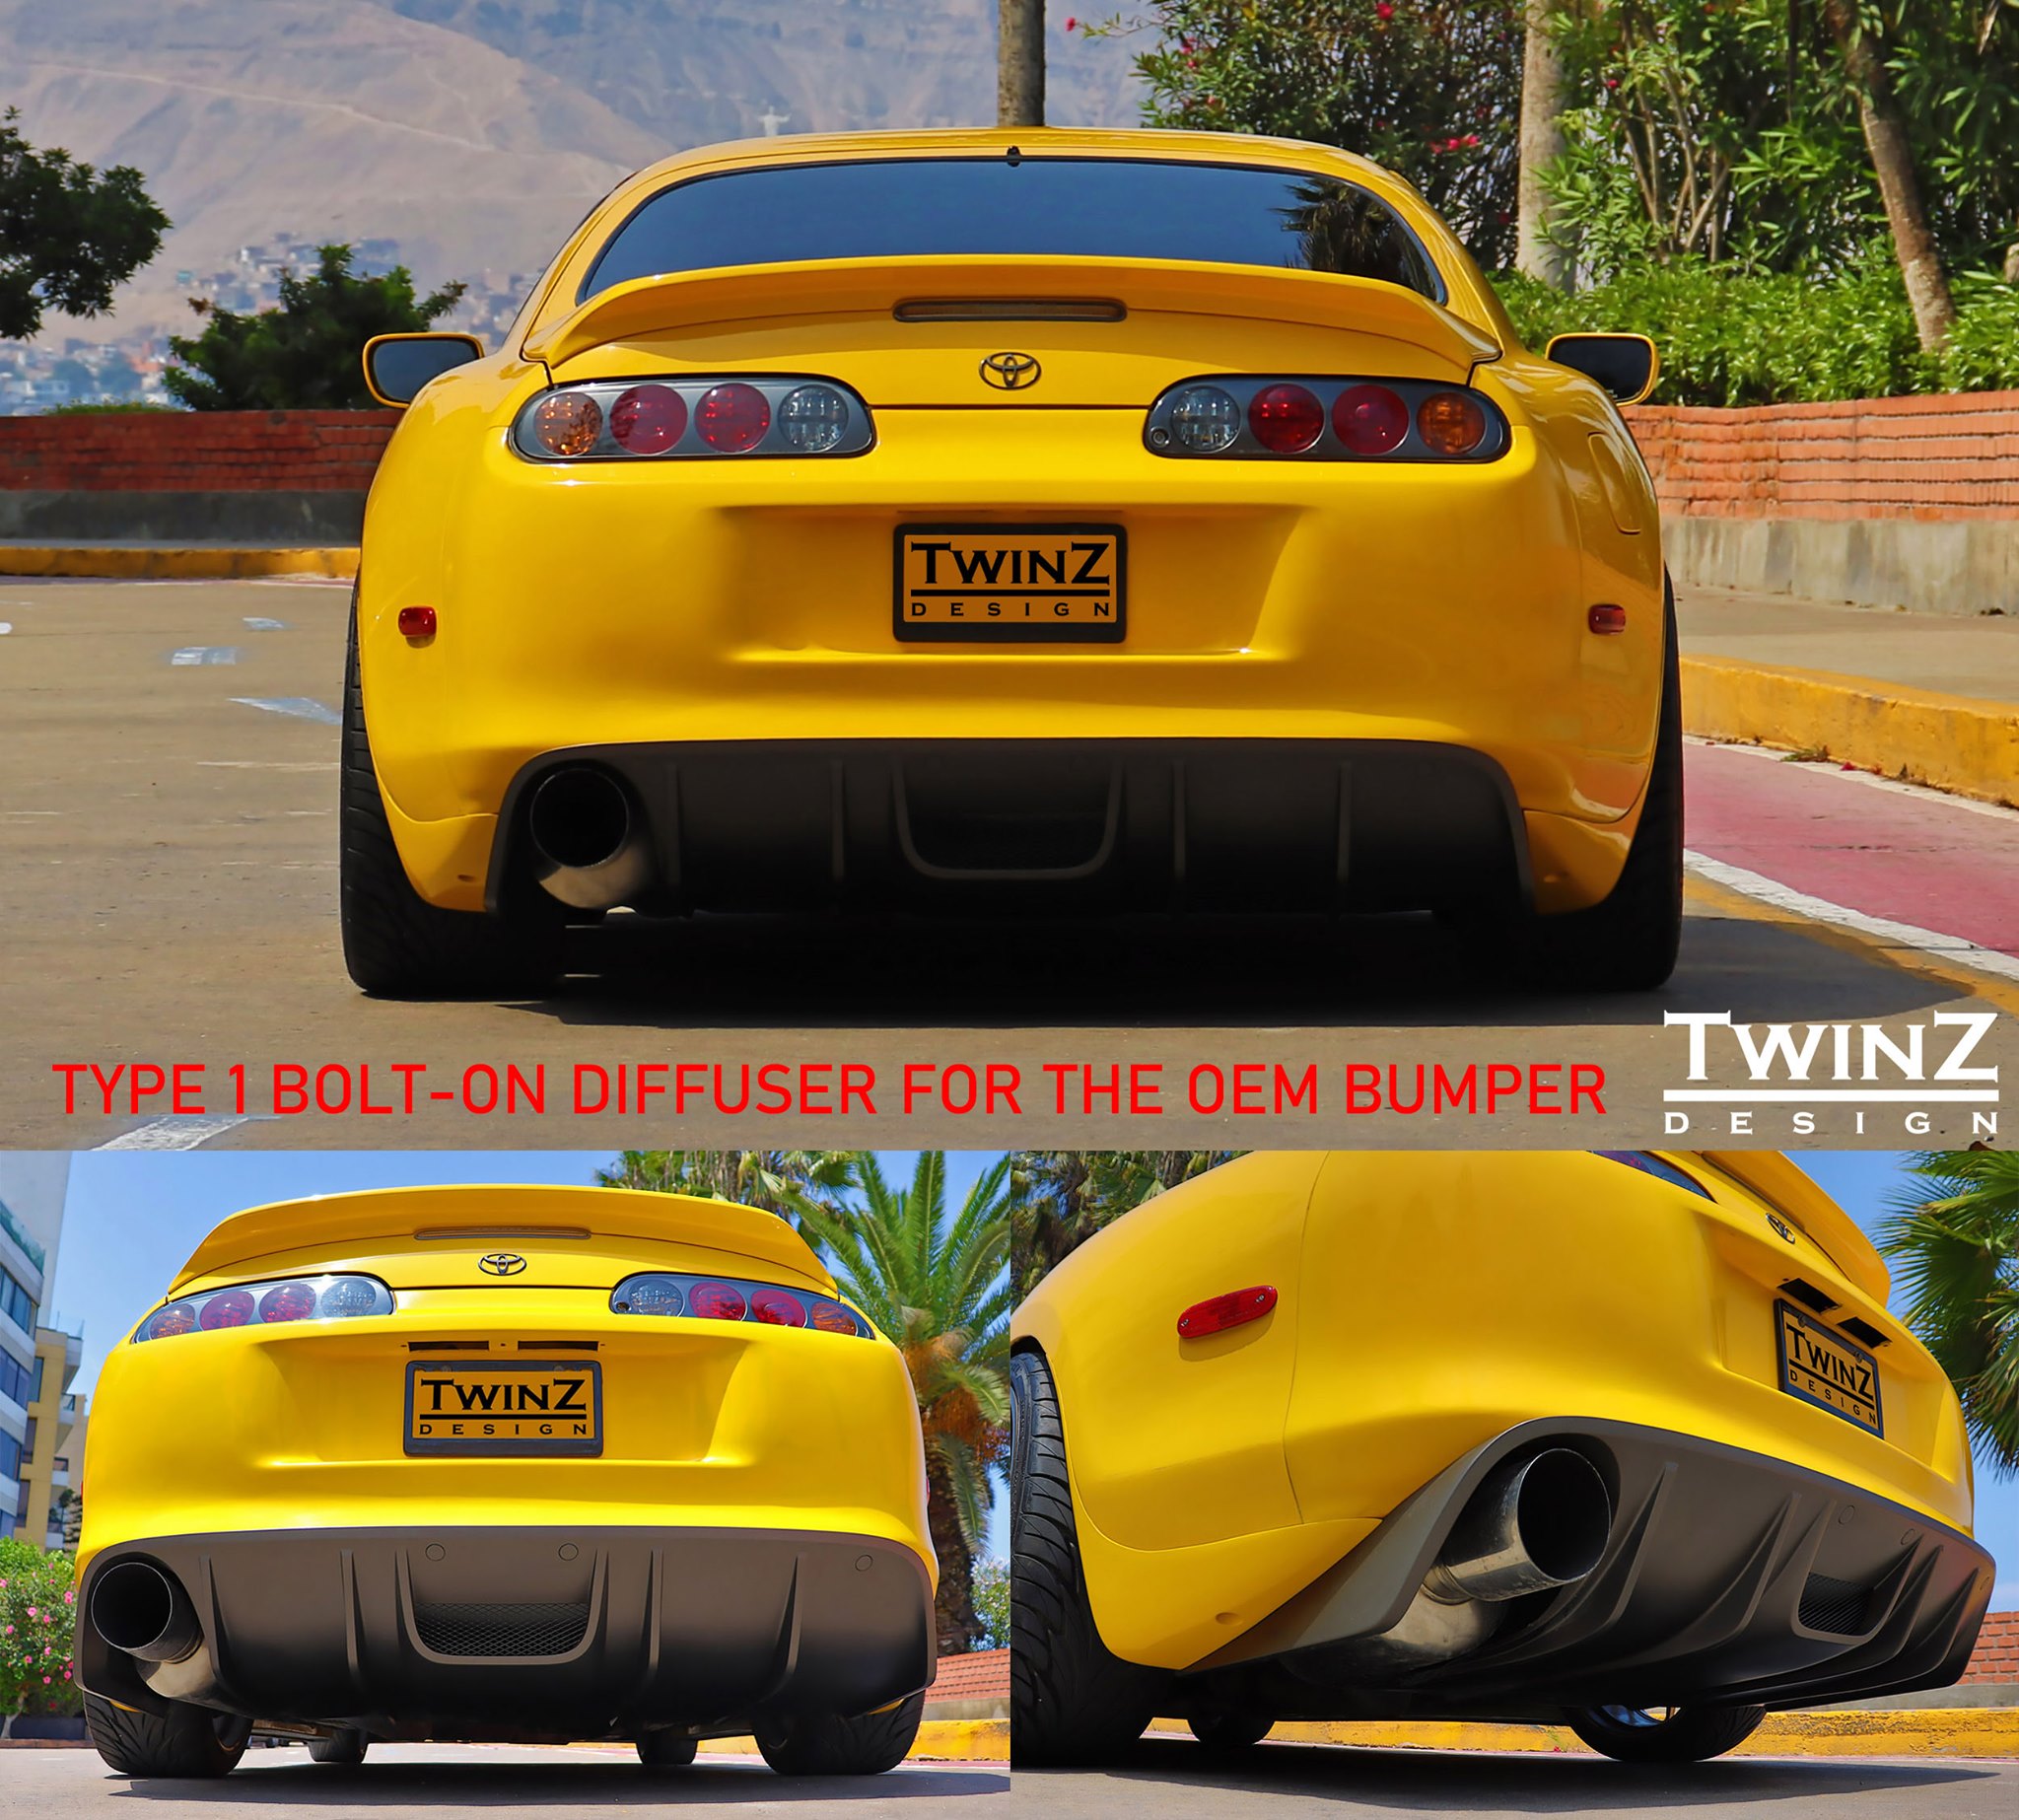
INSTALLATION GUIDE: Type 1 Rear Diffuser for Toyota Supra MKIV
Image
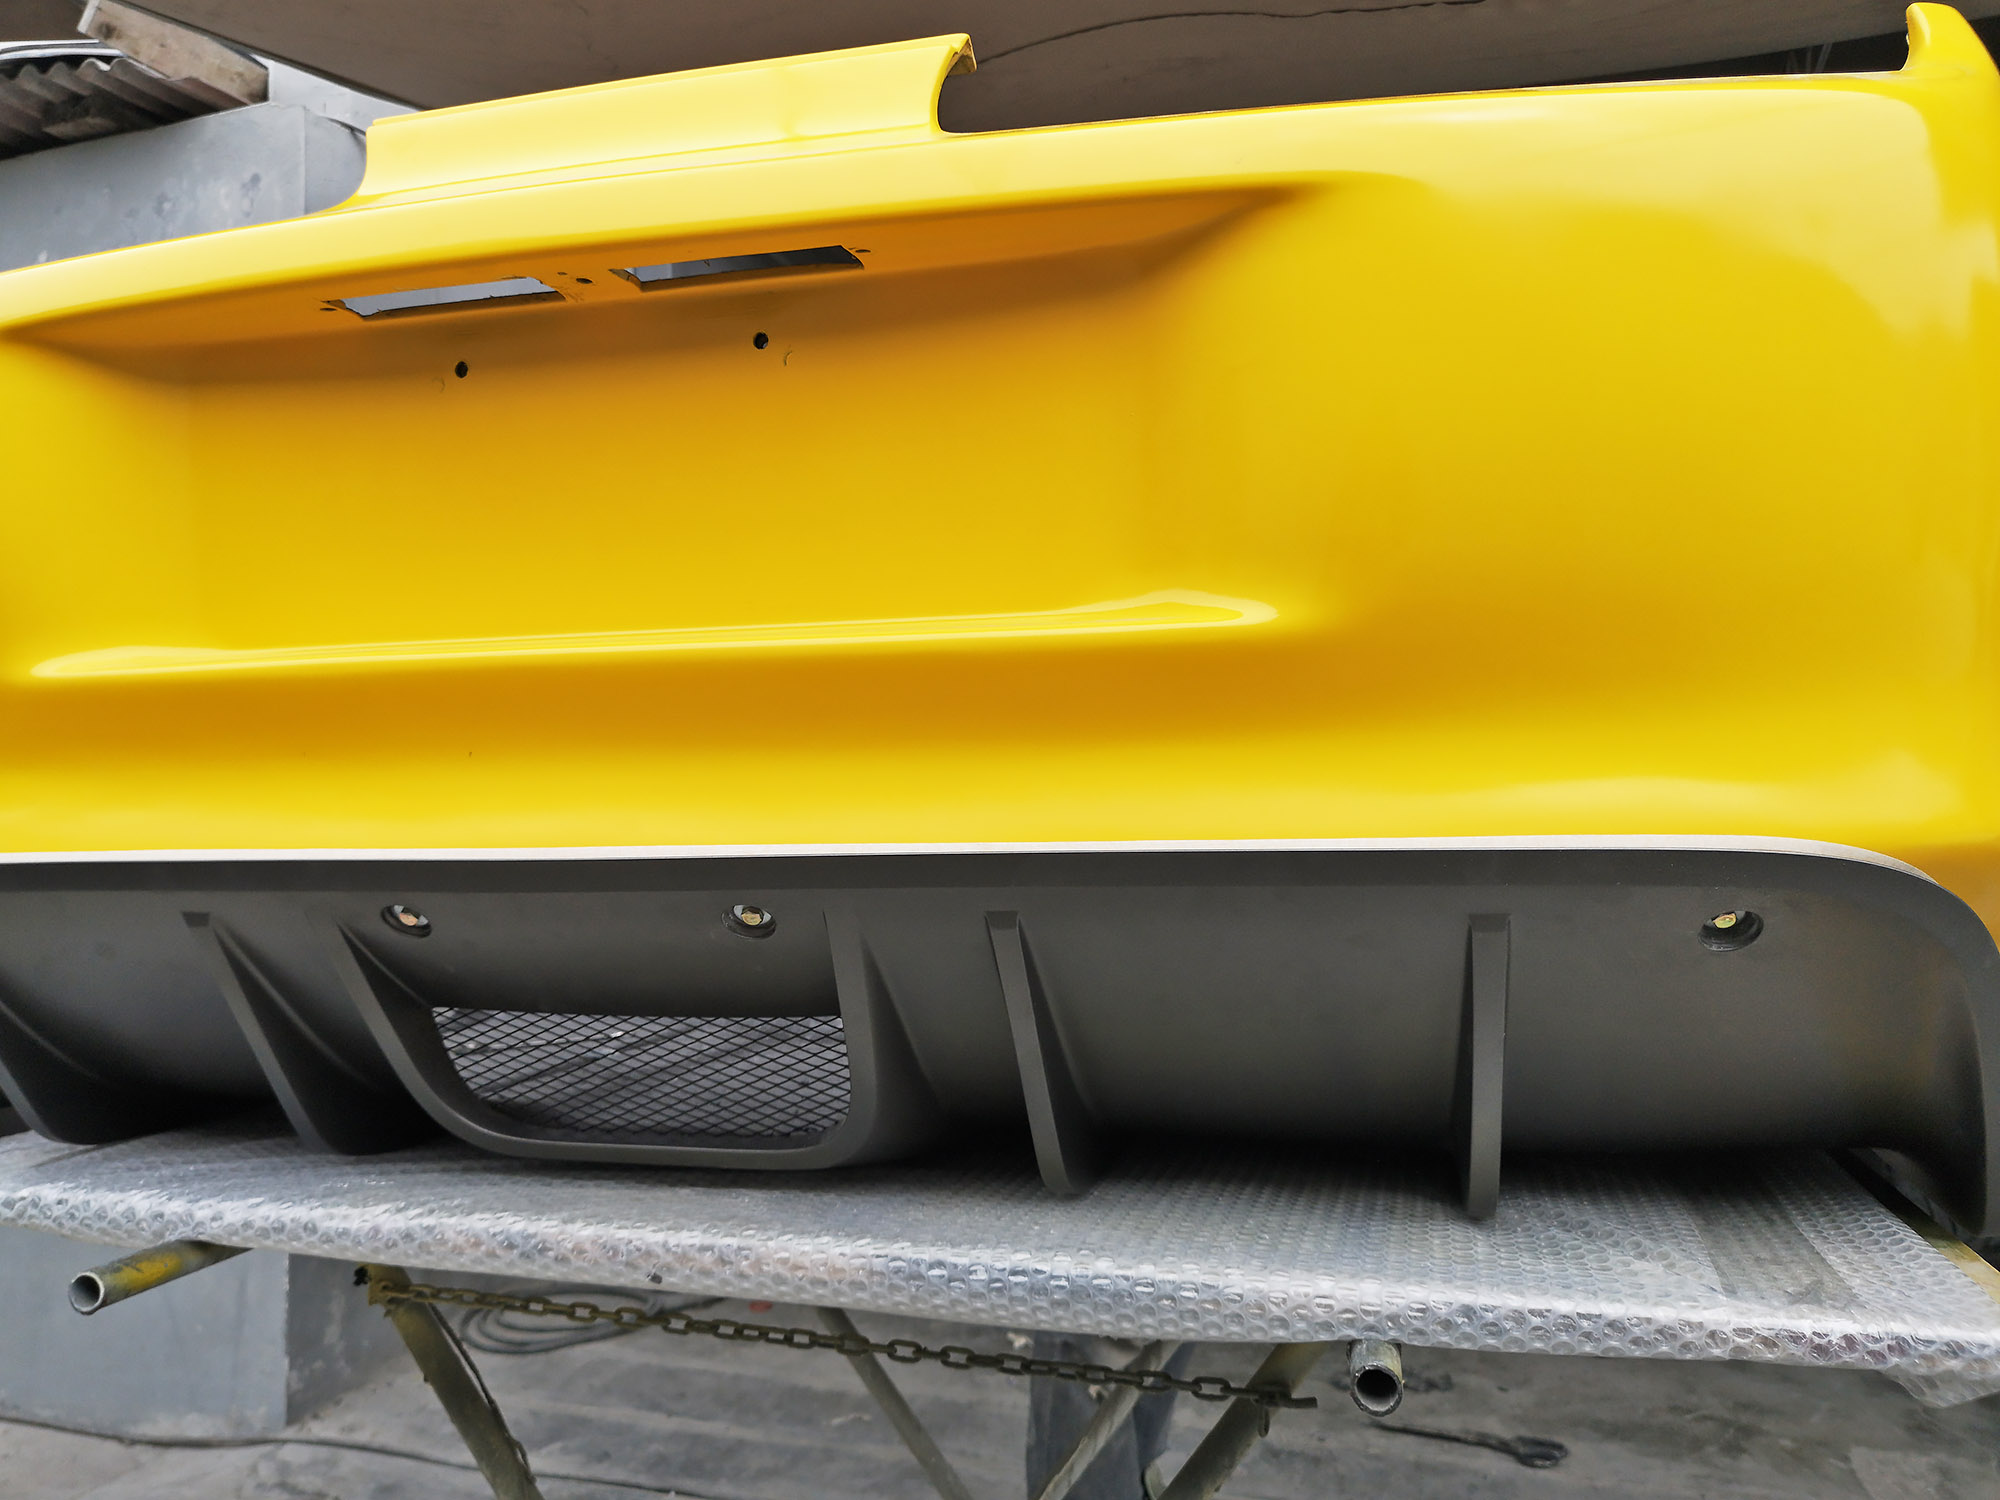
In this installation guide you will find all the steps and information to install the TwinZ Design Type 1 diffuser on the Toyota Supra OEM rear bumper.
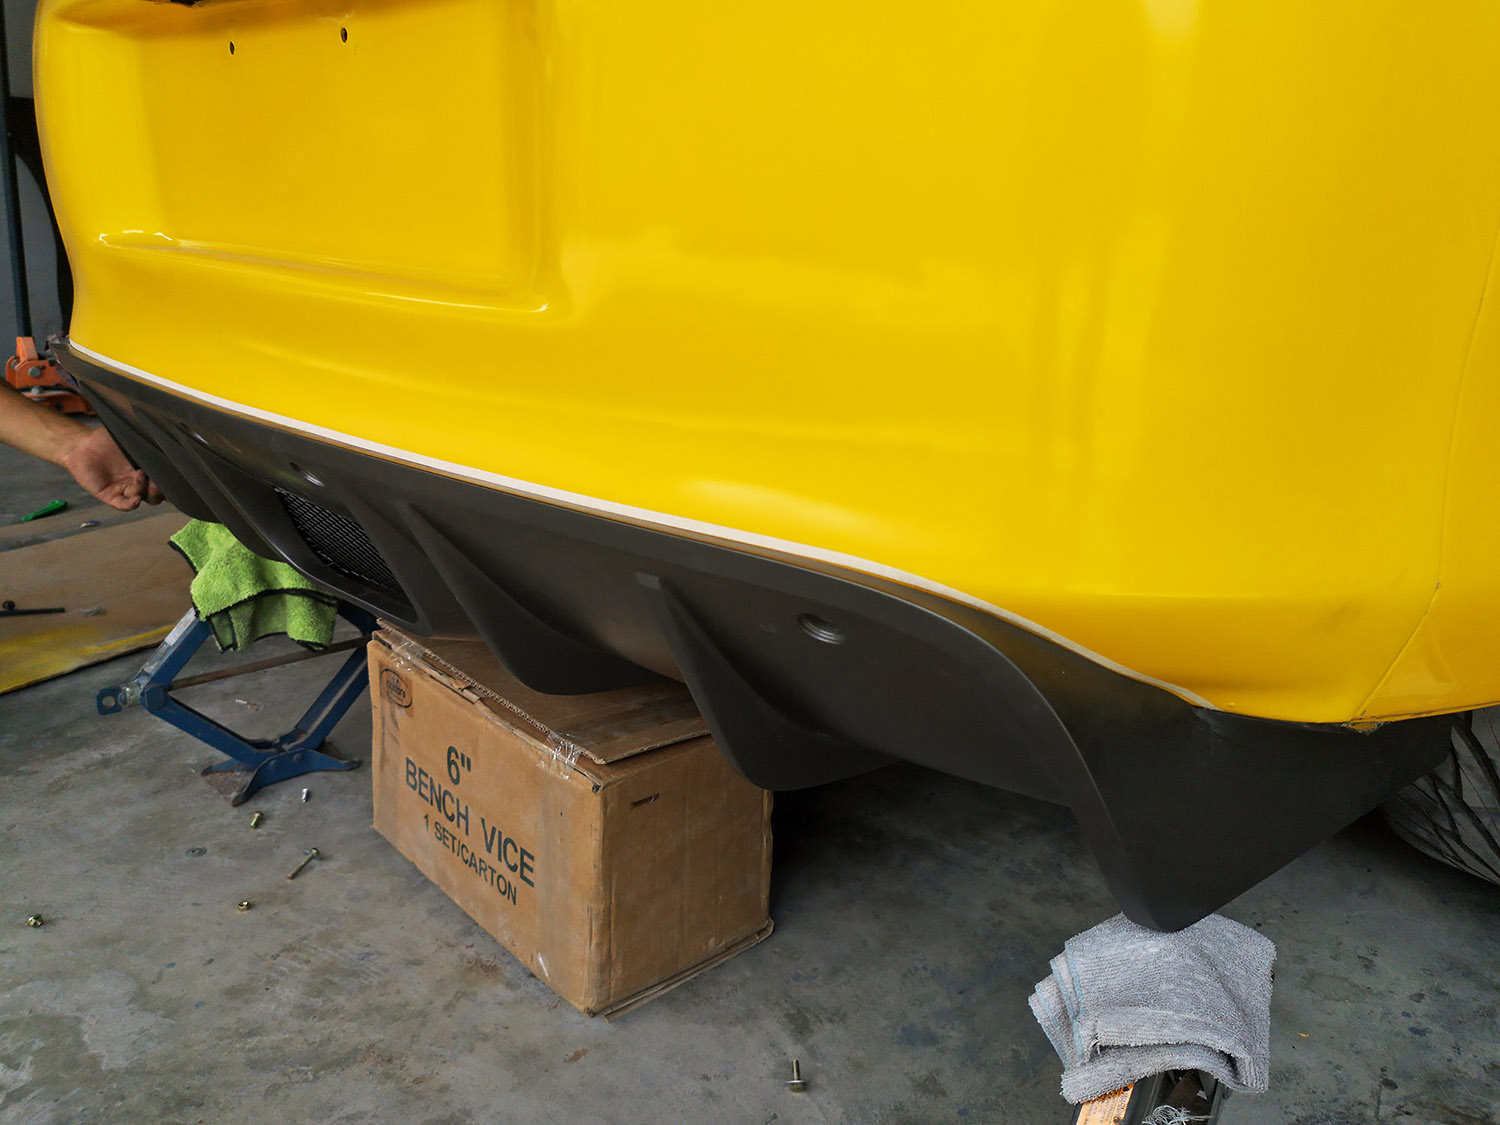
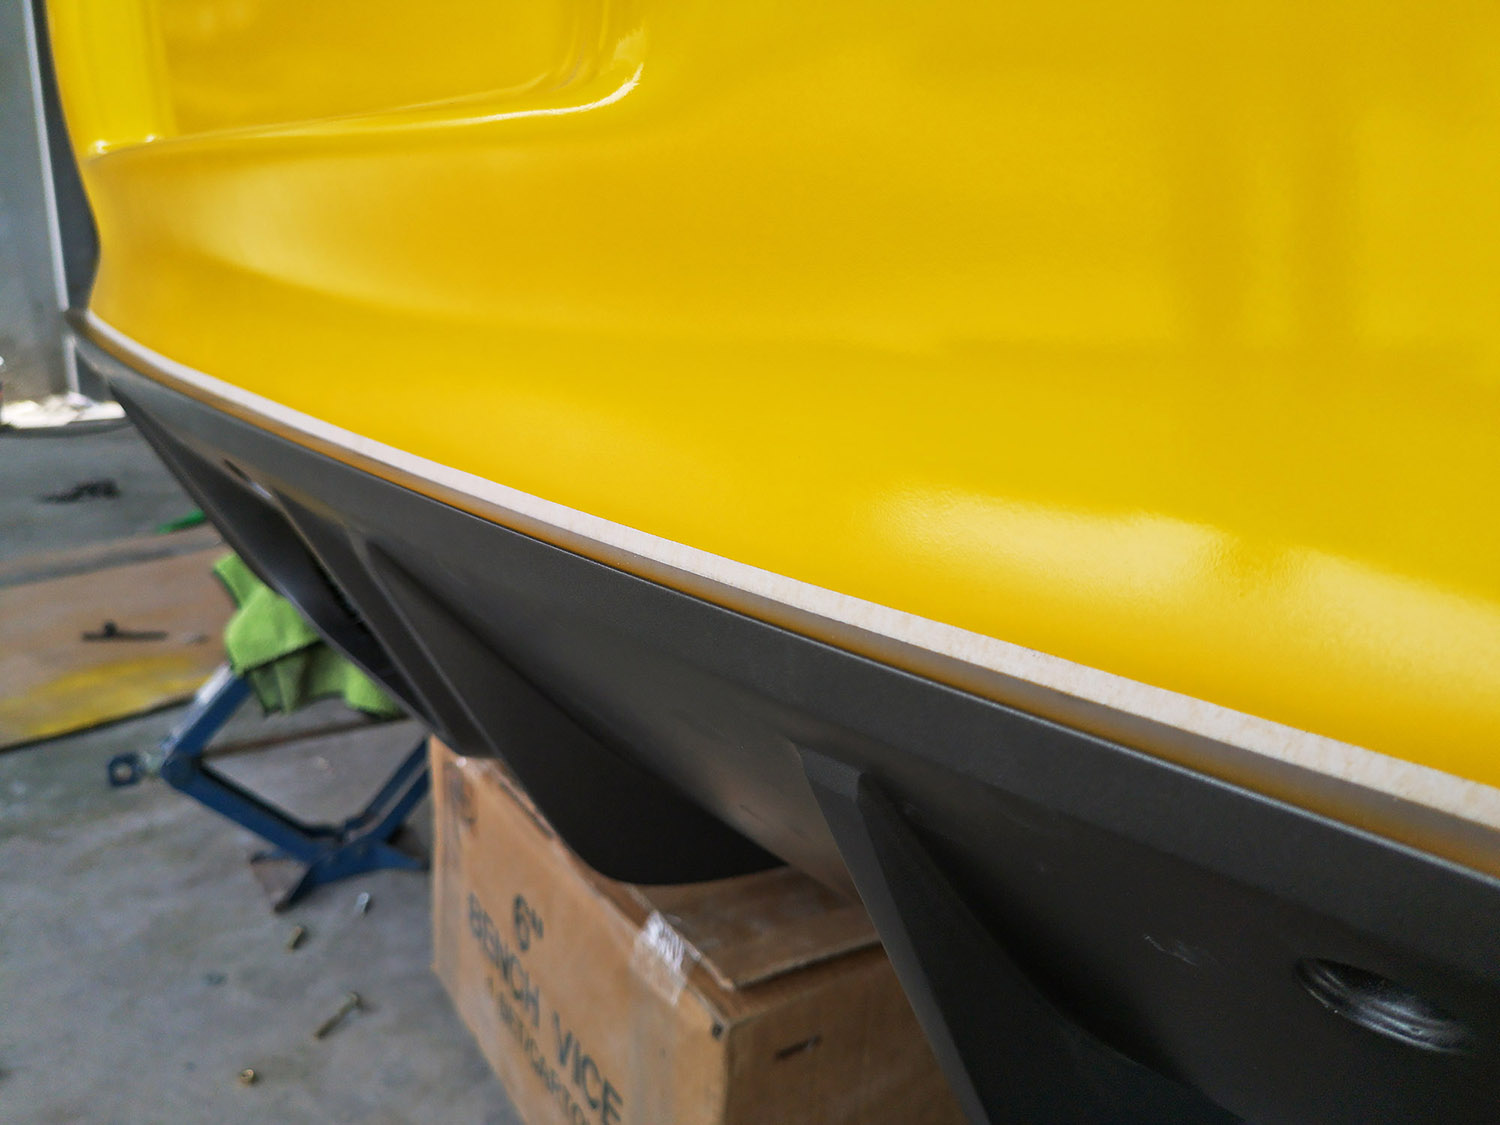
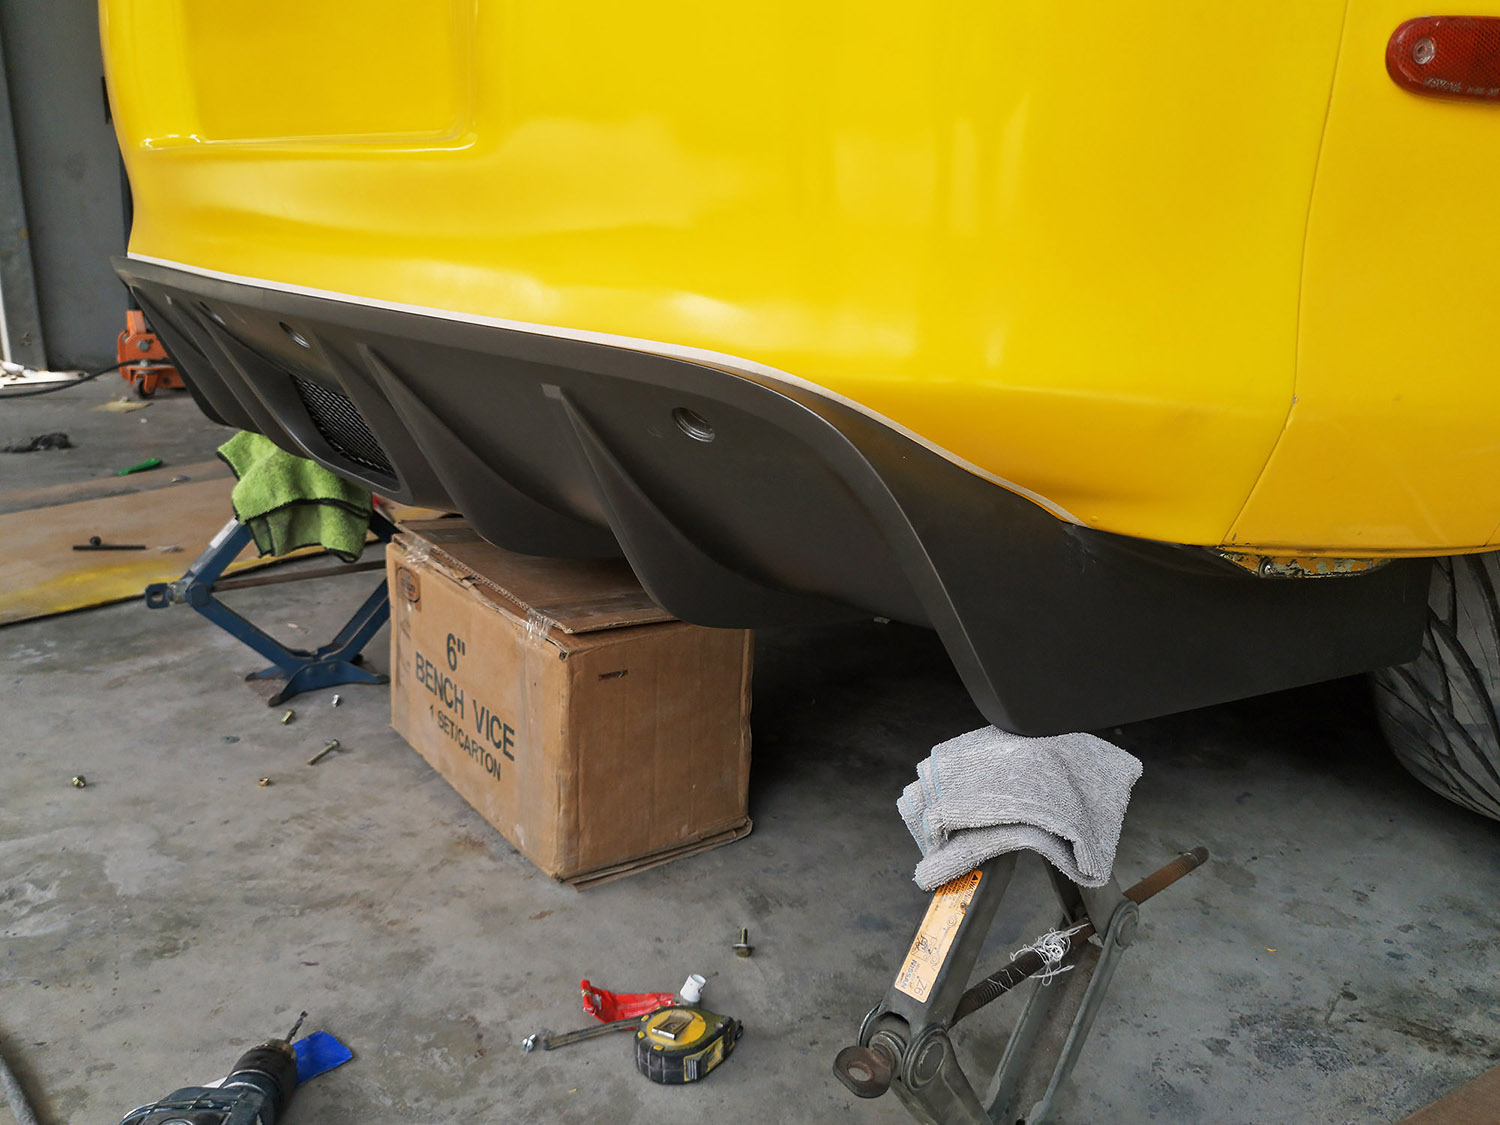
- Place the diffuser making sure it sits correctly on the right position on the rear bumper and mark the contour of the diffuser on the bumper as reference of the final position.
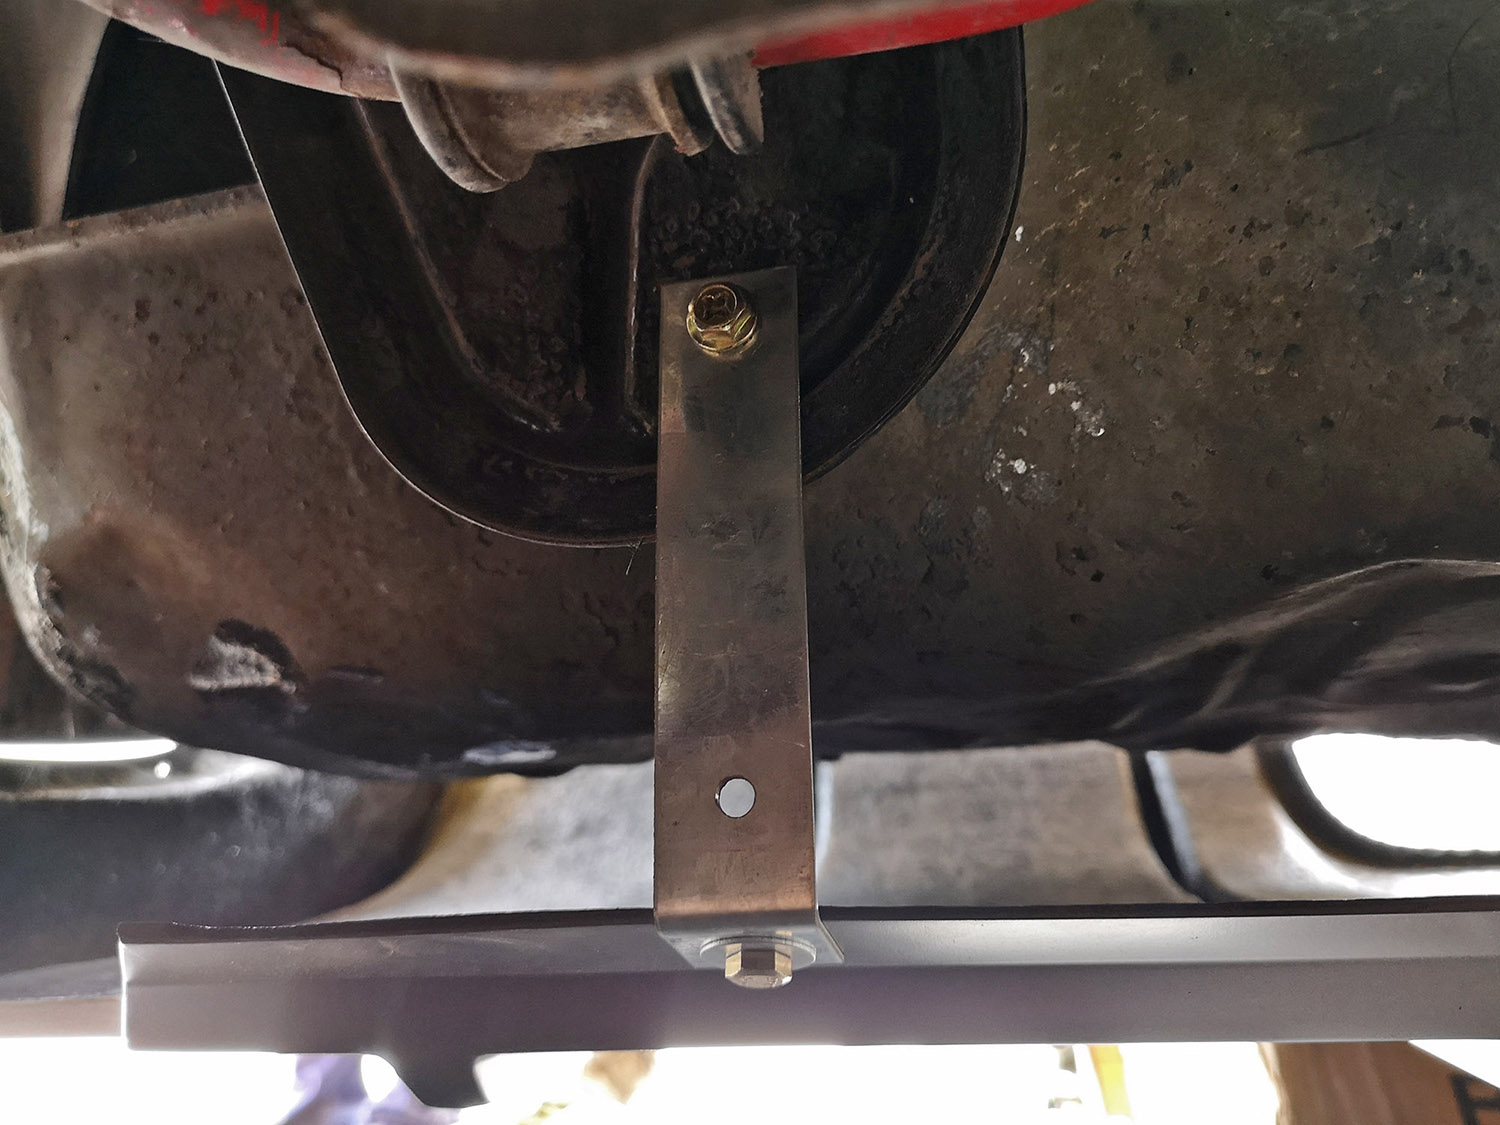
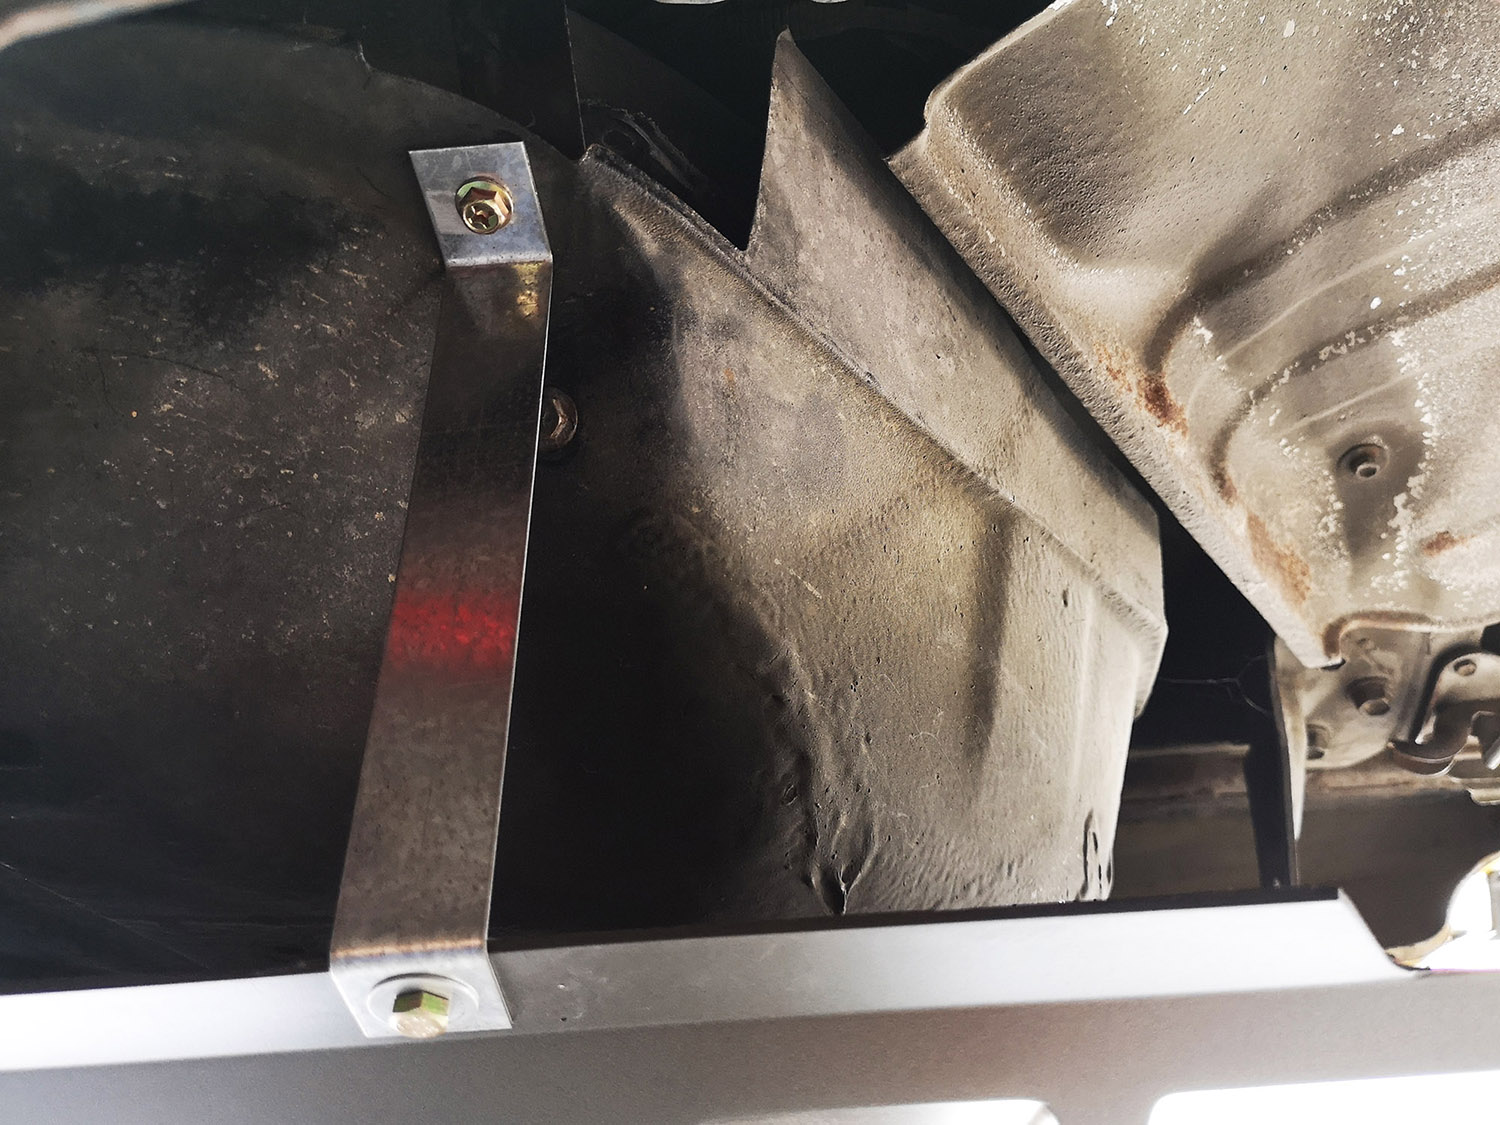
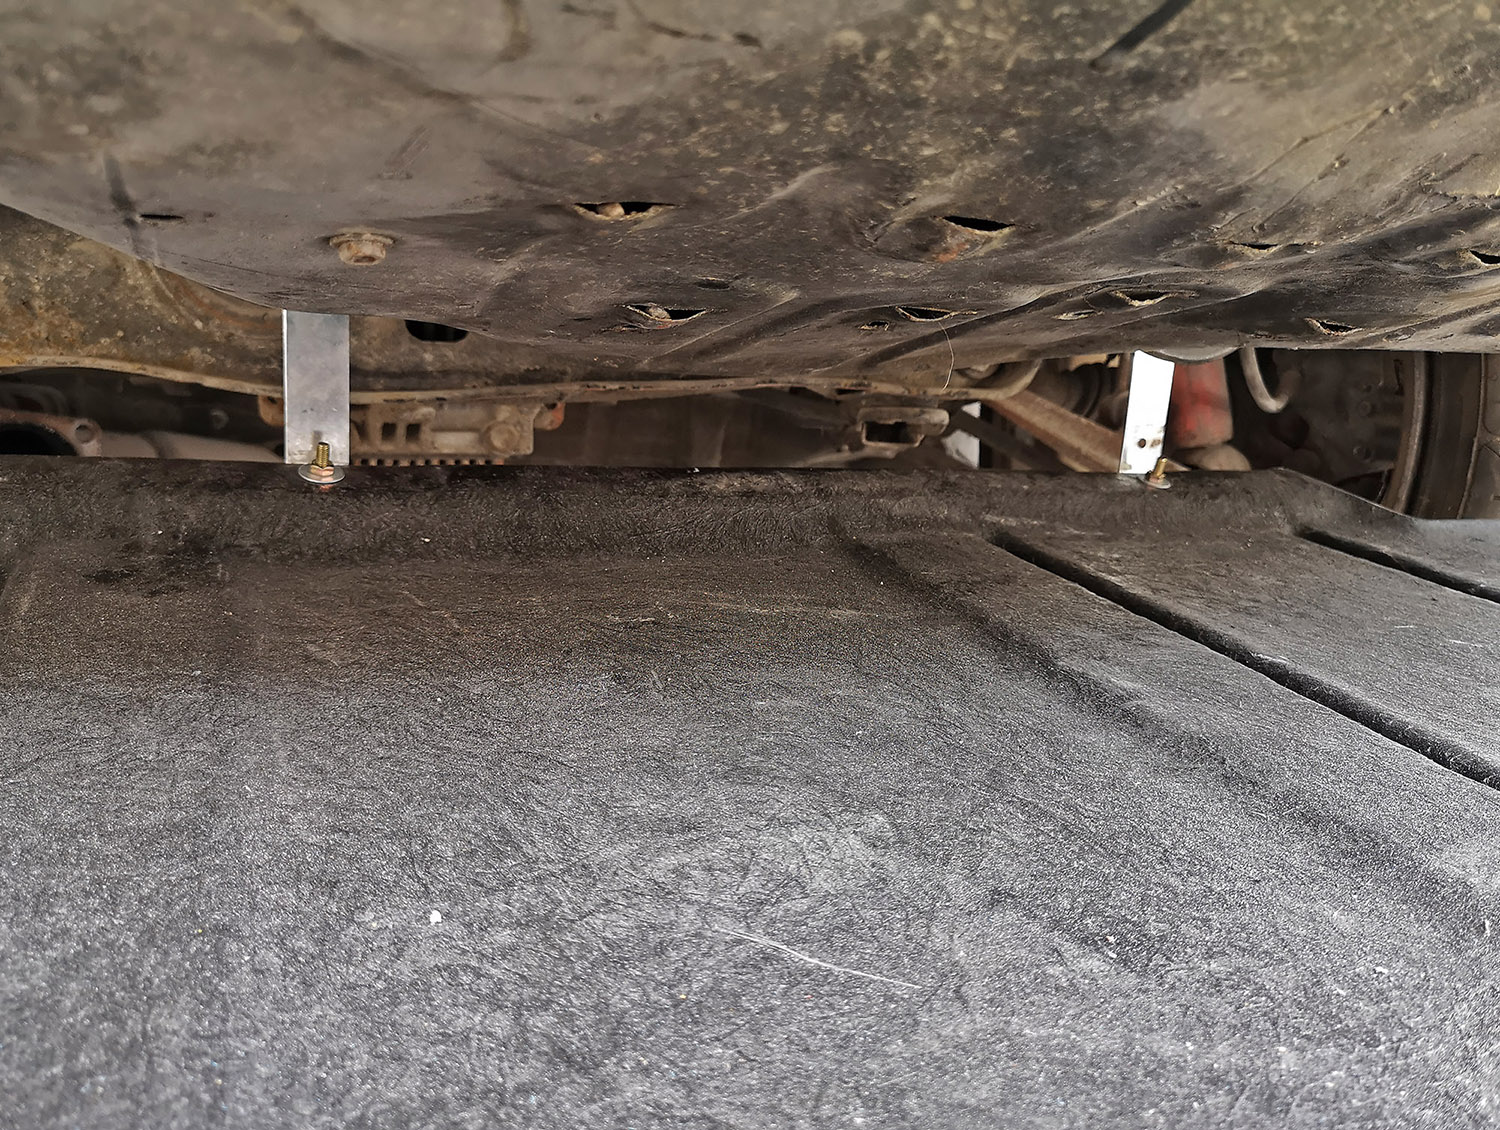
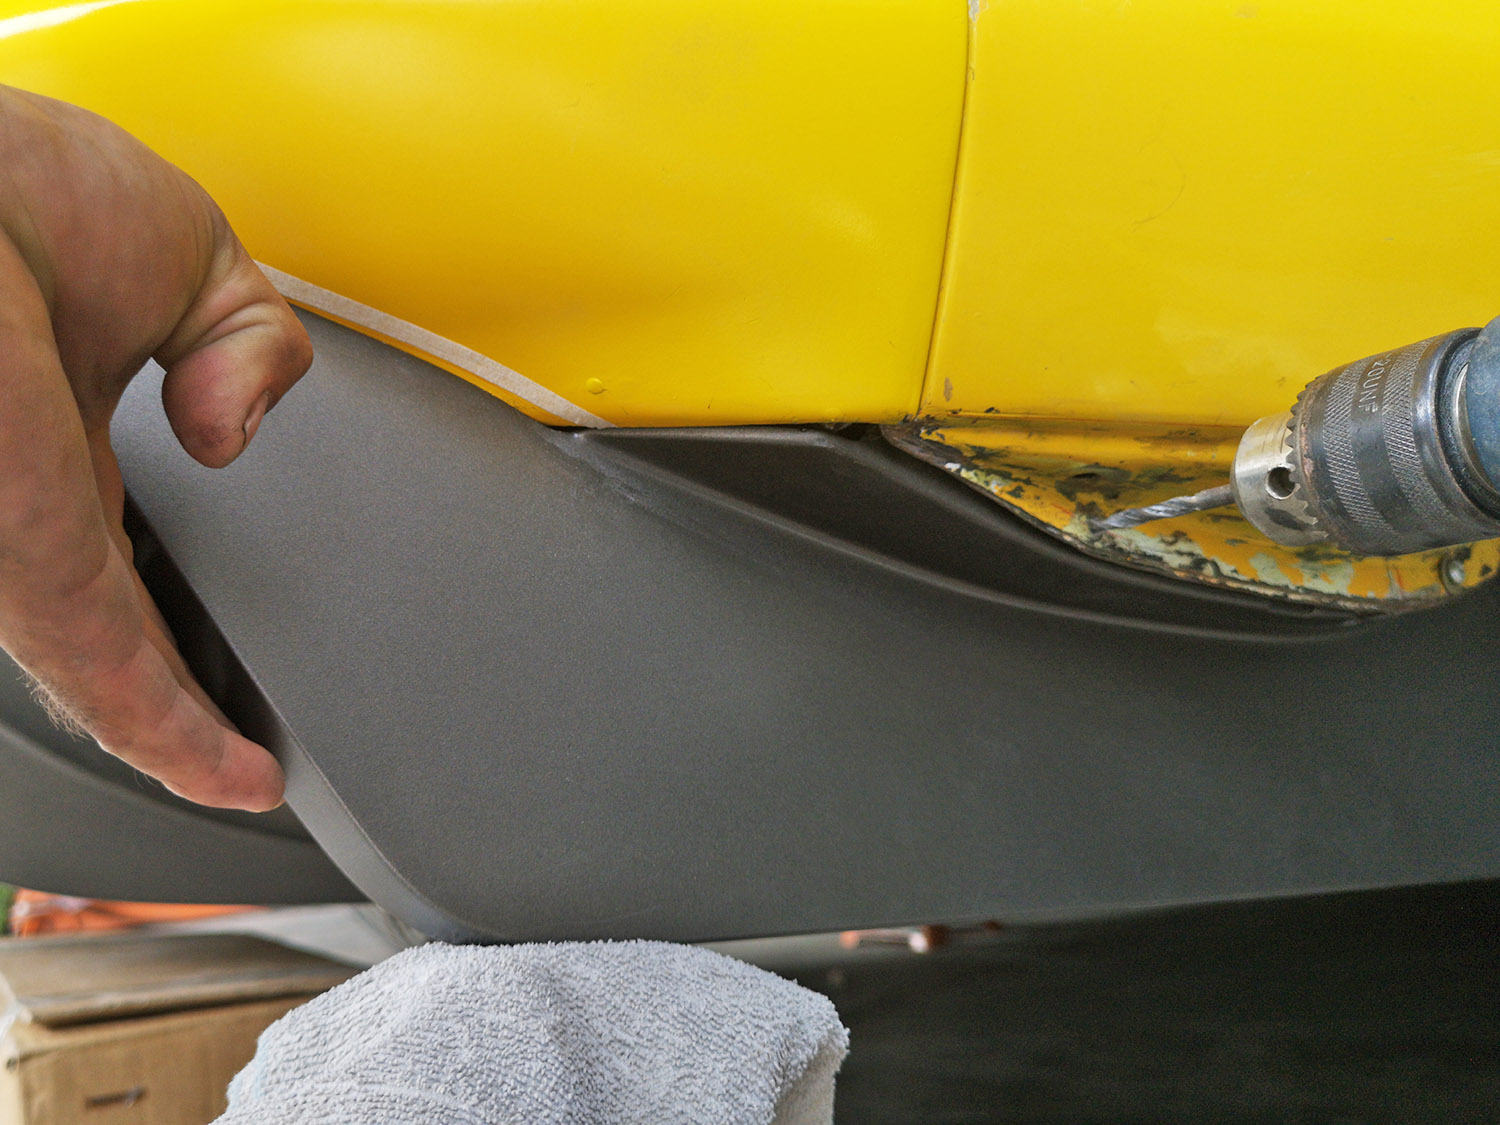
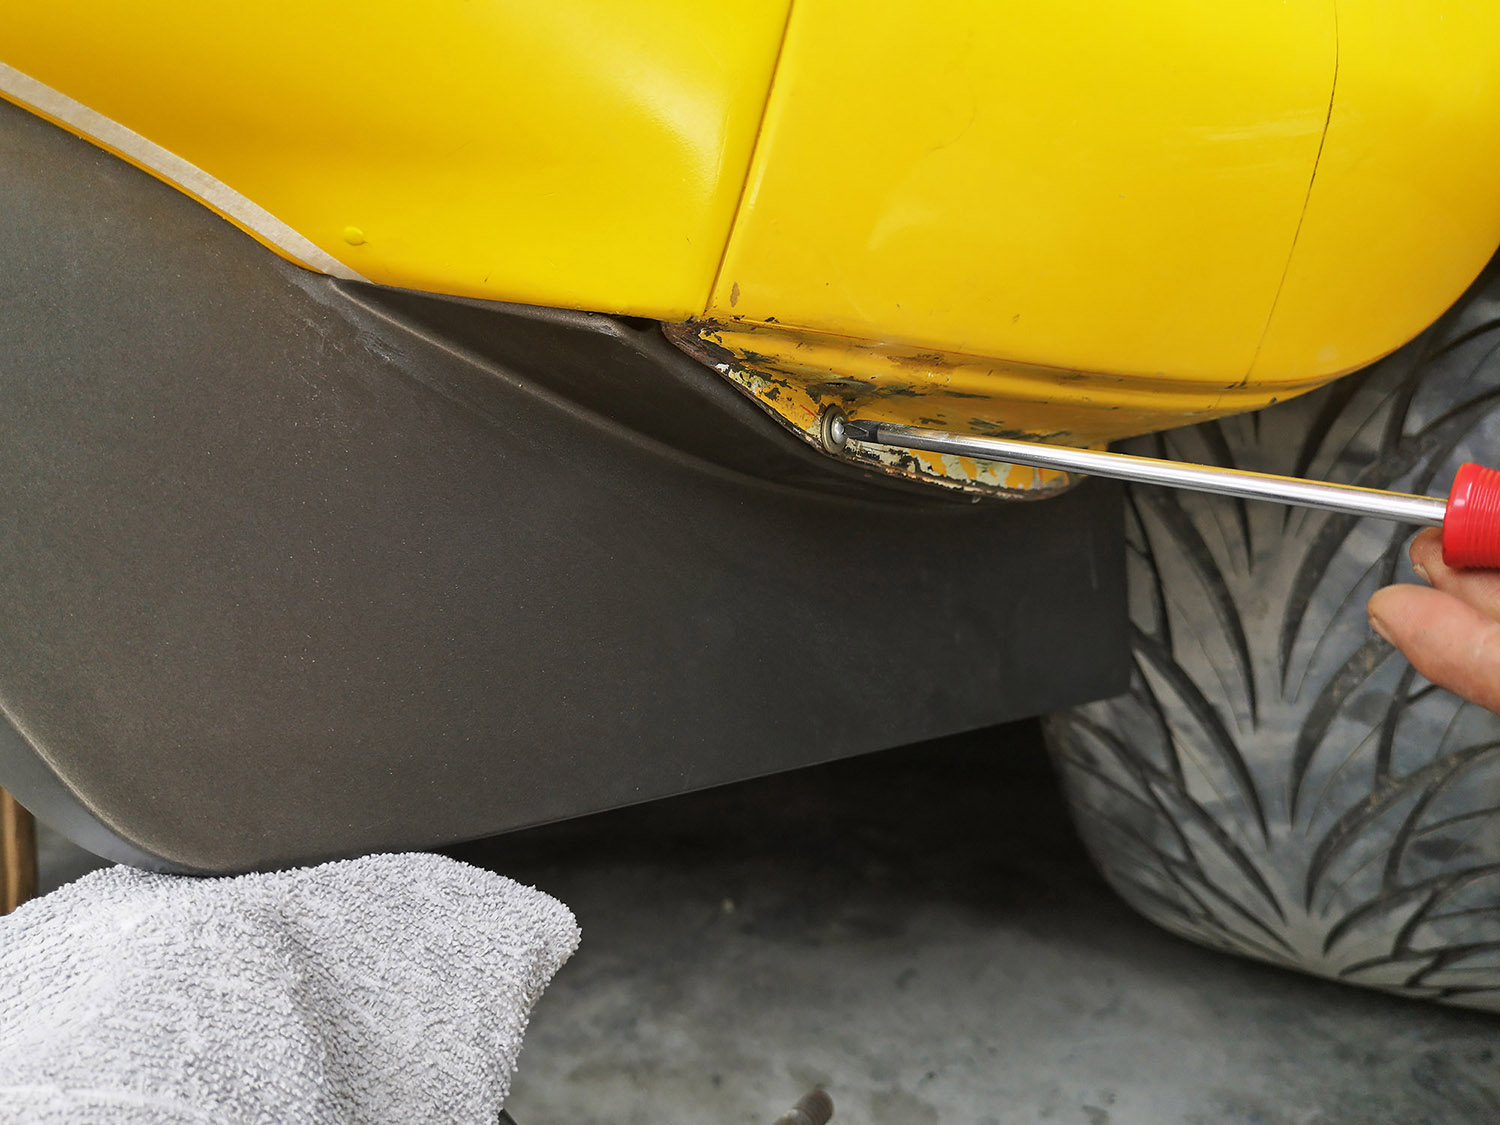
- Drill 2 holes per side on the diffuser and lower section of the rear fender, then use the screws and washers to keep the diffuser in place.
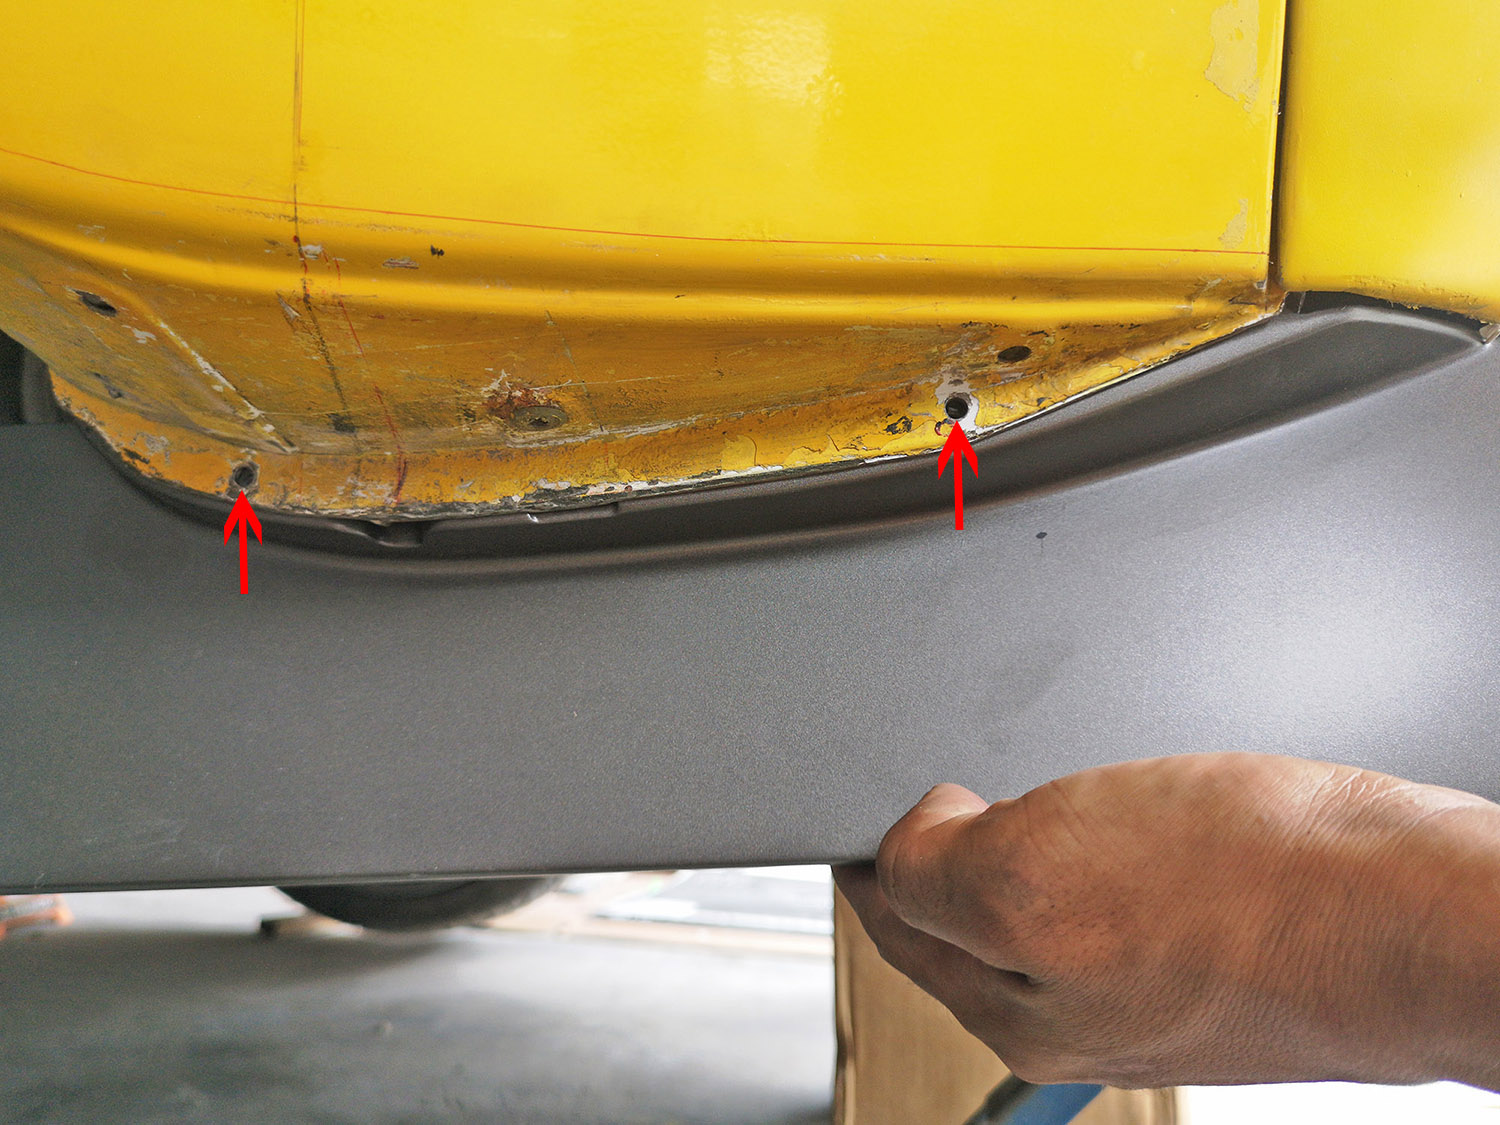
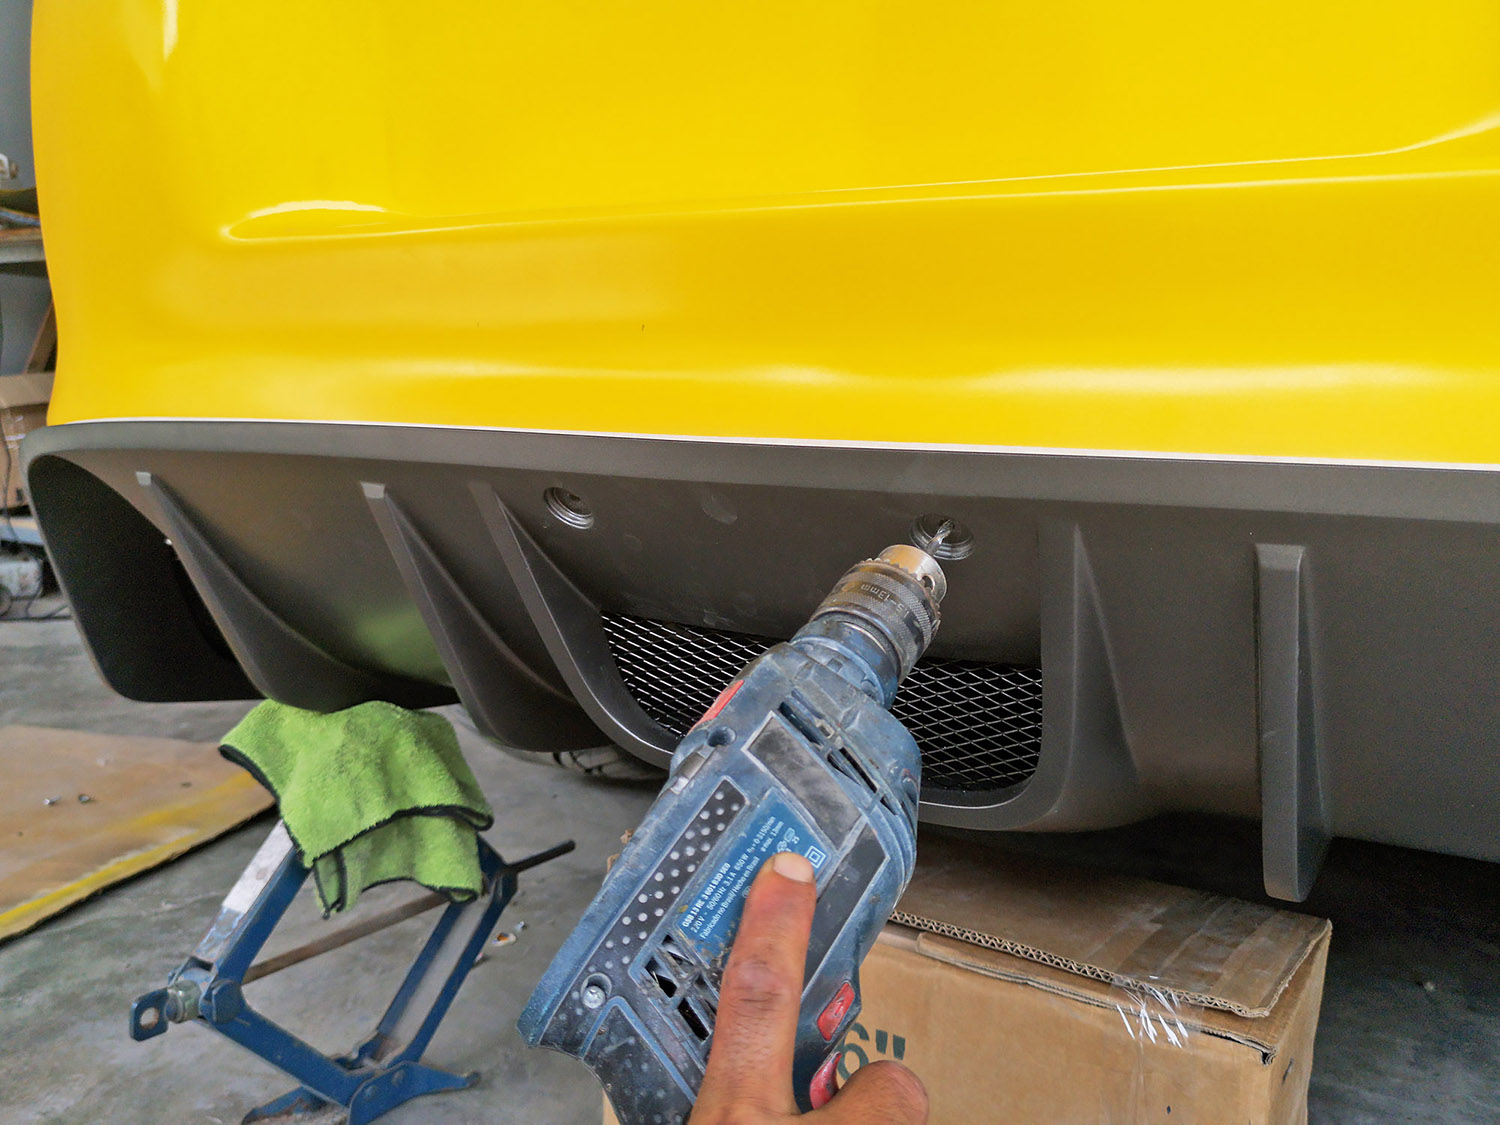
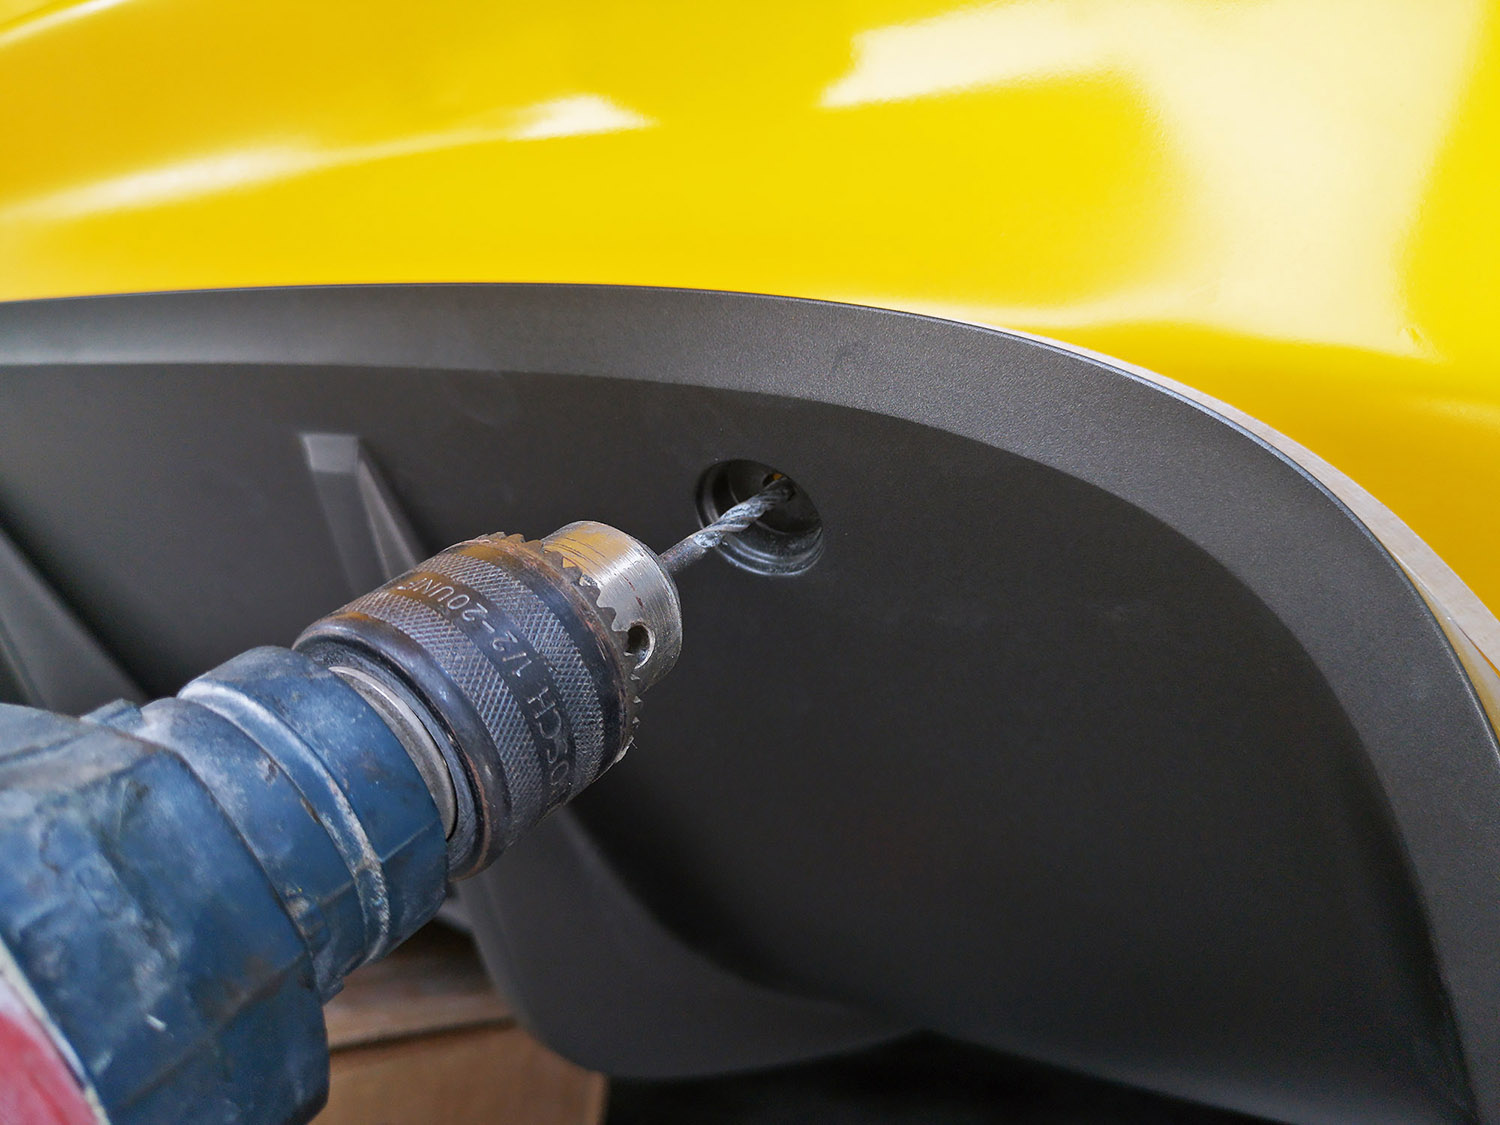
- Drill the holes on the bumper sections


- Remove the bumper and install the bolts in the holes you just drilled, always keeping the final position of the bumper.
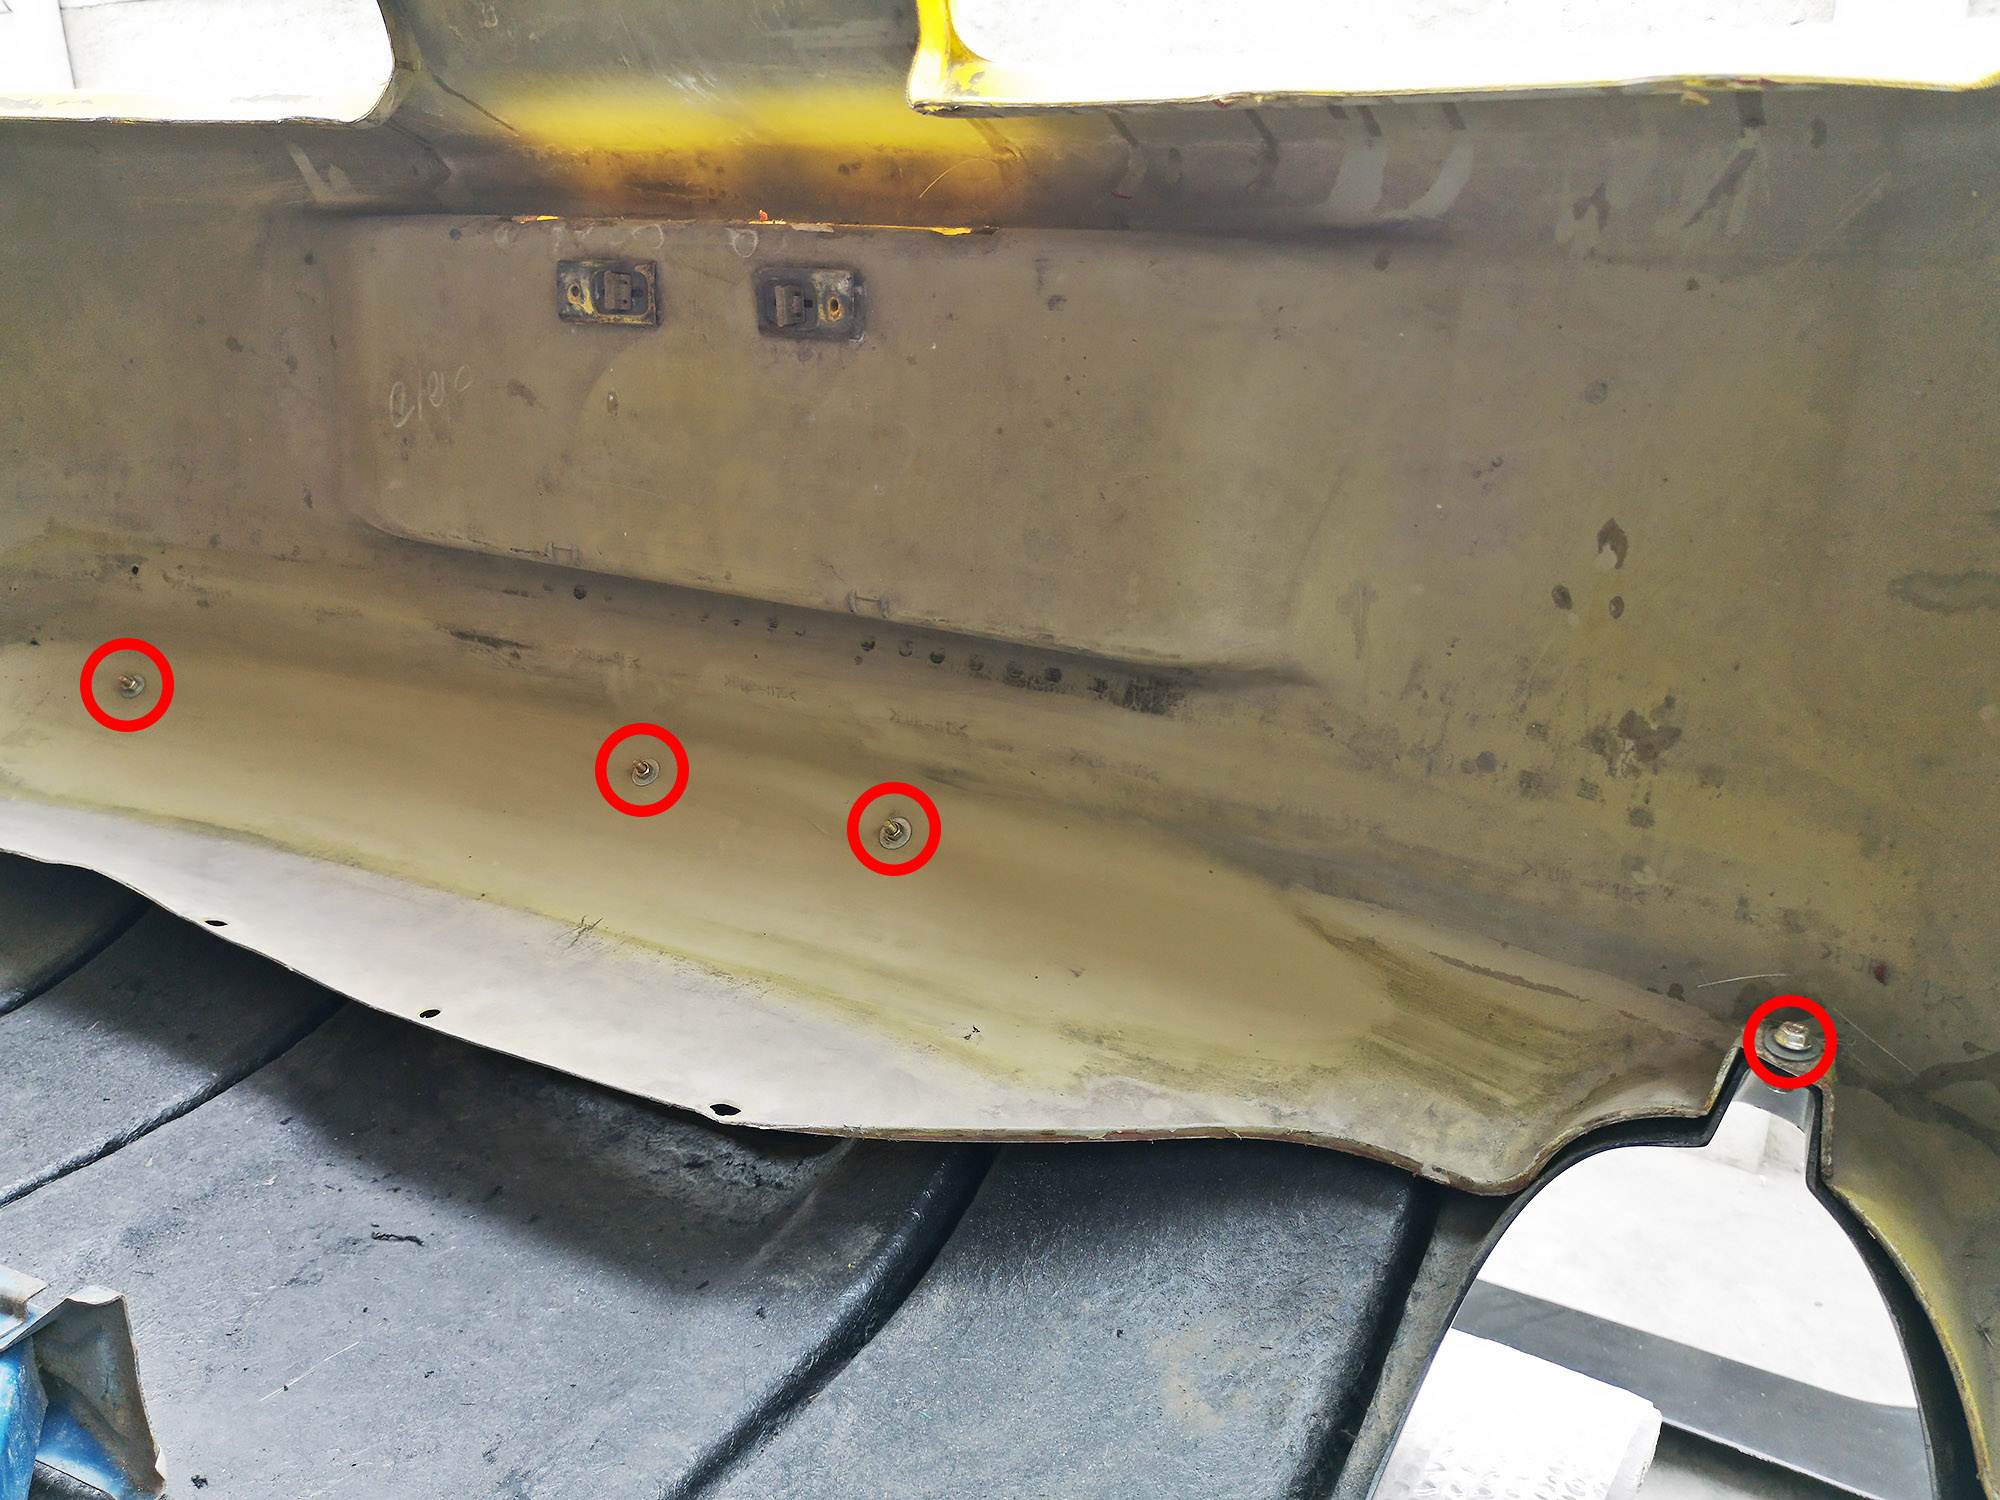
- Install the bumper back with the diffuser attached now and install the metal brackets as shown on the pics.